
Introducing Our New Hinge Reinforcer
To be used with our Post Pro Adapter for installing 5-inch vinyl posts over galvanized pipe.
For gate posts, we recommend 2 3/8 pipe driven 4.5 feet into the ground.
Properly installed, the Reinforcer more than doubles the thread “bite” of the screws holding the hinge. It also creates a mechanical bond between the hinge and the galvanized pipe. This relieves the stress on the vinyl post and transfers the weight load of the gate, as well as the torque, to the steel pipe.
Hinge Reinforcer – Gate Strengthening System
Four collars and 2 hinge reinforcers make up the support system for gate hinges. Two collars and 1 reinforcer will support and strengthen the latch area.
Following the order in these instructions will allow for efficient, accurate installation of gates.
-
-
-
- Determine the hinge placement height as it will vary from fence style to fence style so each will be somewhat unique.
- For our example we are assuming a 6’ privacy fence and gate.
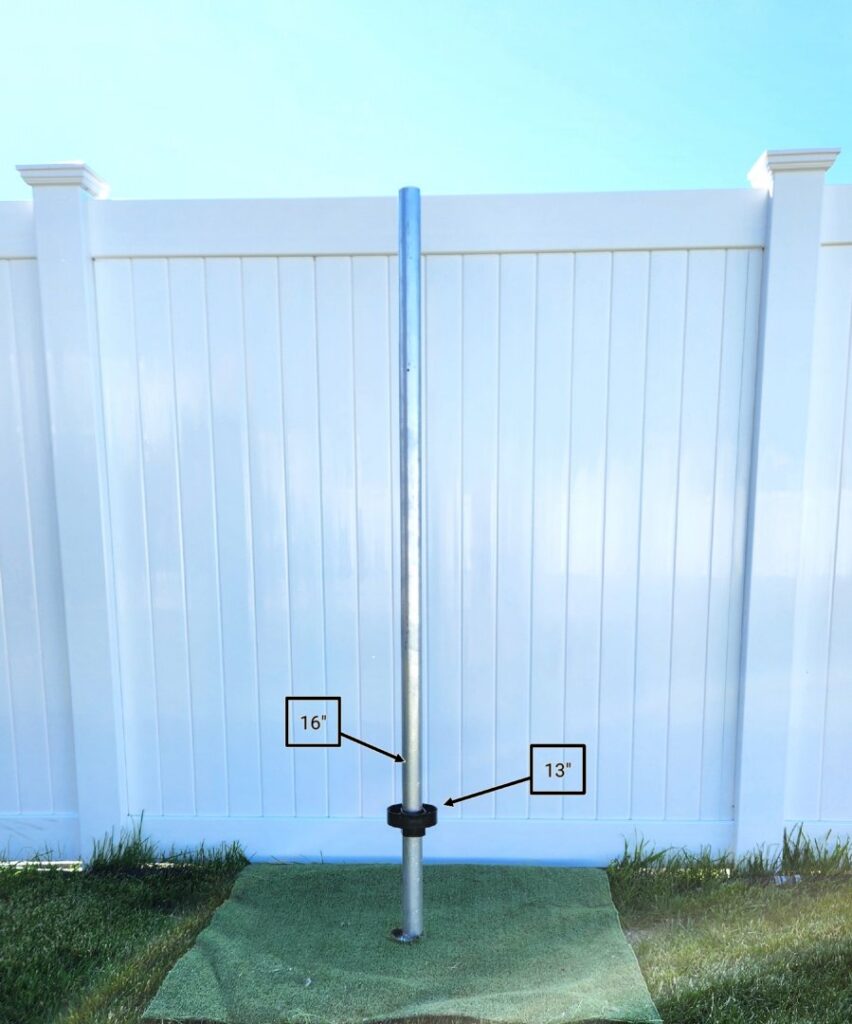
- Mark your steel post where you want the hinges to attach to the vinyl (once assembled). Our example is 16” from the ground. These dimensions are an example only and may vary due to the fence height, style and terrain, etc.
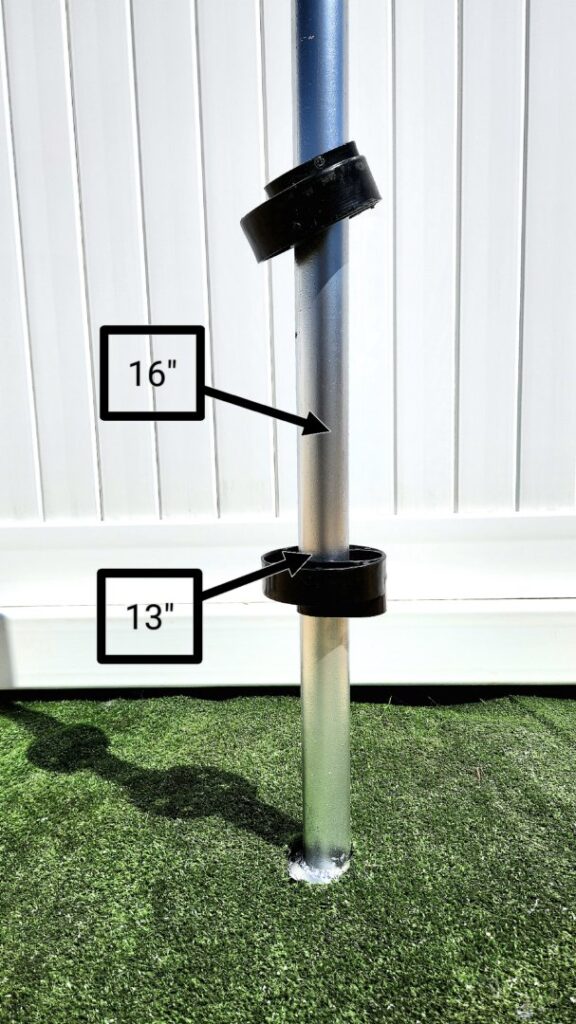
- Install bottom collar cup side up 3” below the 16” mark on the post (13”). Slide a second collar cup side down but do not attach this will be the top of the lower assembly. See pic #1 & #2.
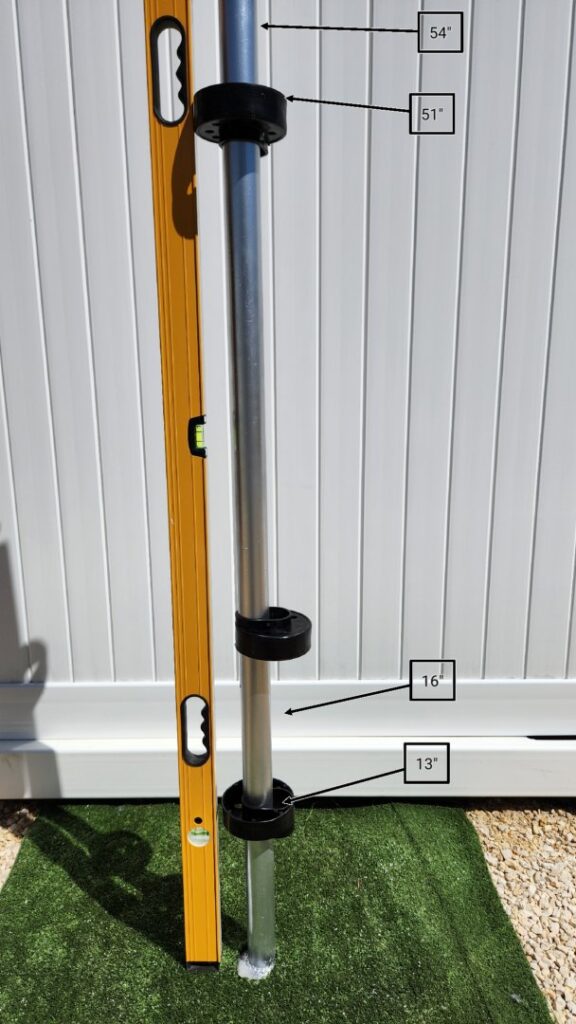
- Install the next collar cup side up 3”s below your upper mark of 54” (51”). Use a long level usually a 6’ is best to plumb and level the two collars that are cup side up. This will ensure a perfectly straight vinyl post when you are finished. See pic #3.
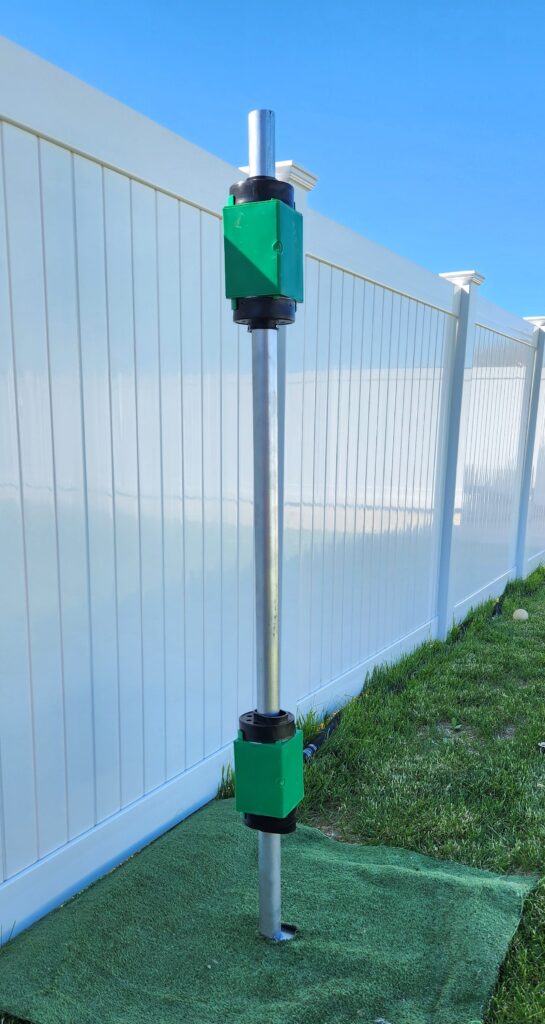
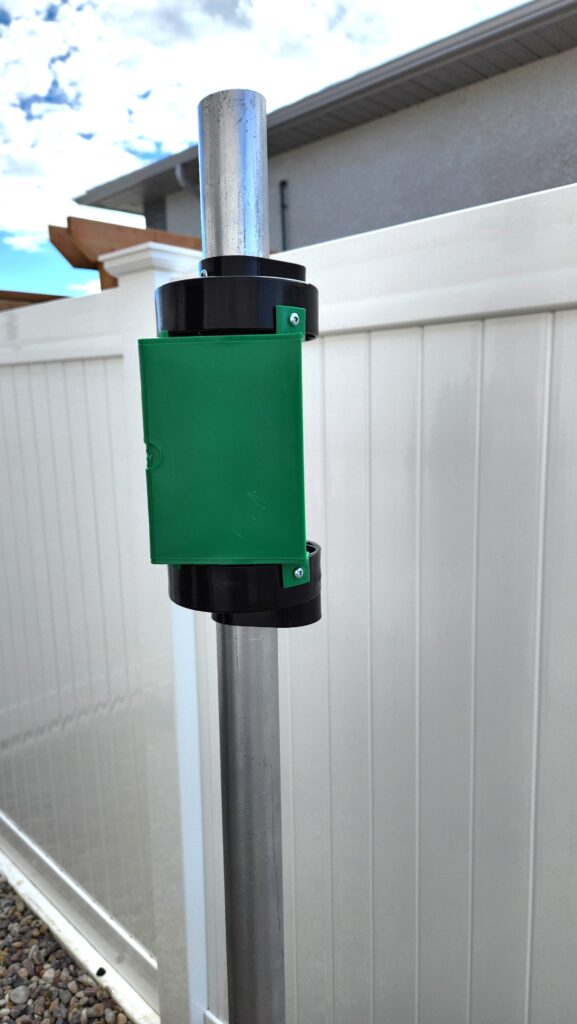
- Now attach a hinge reinforcer to each fastened collar keeping the flat sides square with the intended fence line. See pic #4.
- The last collar can be slid over the pipe to secure the top reinforcer. This one will be cup side down like the collar that should be loose and between the 2 attached and levelled collars. See pic #5 for a close up on the reinforcer showing where all screws are located.
- The two collars that are cup side down will now form the attachments for the upper side of each reinforcement assembly. Screw all pieces together keeping the two assemblies plumb and square. See close up of hinge reinforcer in pic #4.
- Care should be taken to ensure the Reinforcers are positioned to be in the correct plane of the fence and gate and to be in the position to accept all 8 screws related to the hinge.The same technique is used for the latch post
- although with only one reinforcer assembly located at the height you desire from the ground.
- You can now slide a vinyl post over the strengthened post. The post will be very ridged and solid. It is best to begin fence assembly from the gate posts as the vinyl posts will NOT spin to aid assembly of the rails, whereas the rest of the posts in the fence line will still move freely during assembly. It can be trickier than just sliding over the collars but with a screwdriver or small scraper, you can slide it over (the holes may catch on the assembly).
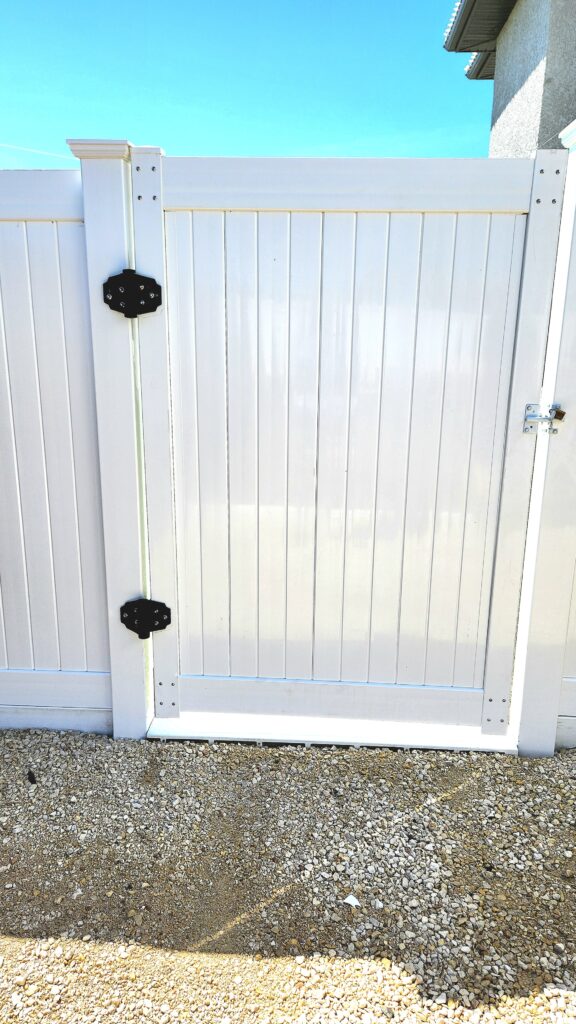
- Do not install the hinges or latch until the entire fence line is assembled and height is permanently set. The Screws that attach the hinges and latch secure the height of the posts. Be sure that the posts for the gate are exactly where you need them. See pic #6 for finished gate.
-
-
Unique Endeavors designed, developed and improved the Post Pro system from customer input and industry demand.
Store Location
350 Transport Road
Sunnyside, Manitoba
R5R 0J5